

How to Optimize Images for SEO and Boost Rankings
Sections
If you’ve been treating image optimization as just another technical chore on your to-do list, you’re missing out on a huge opportunity. Think of it less as a task and more as a secret growth lever. Getting your images right directly impacts your site’s performance, how long visitors stick around, and, ultimately, your bottom line.
When your visuals load fast and tell search engines what they’re about, you create a seamless experience that Google actively rewards. This isn’t just about shaving a few milliseconds off your load time; it’s about building a stronger, more visible online presence from the ground up.
#The Real-World Impact on Performance and Engagement
Let’s be honest: nothing kills a user’s vibe faster than a slow-loading page. In fact, a staggering 53% of users will bounce if a site takes more than three seconds to load. And what’s usually the biggest culprit behind that sluggishness? You guessed it - large, unoptimized images.
By dialing in your image optimization, you’re directly tackling this problem. You’re not just making your site feel snappier; you’re also getting in line with critical performance benchmarks like Google’s Core Web Vitals.
This isn’t just theory. Websites that meet Core Web Vitals standards can see up to a 24% increase in user engagement. That means more time spent on your site and a much higher chance of turning visitors into customers.
#Building a Rock-Solid SEO Foundation
Beyond pure speed, smart image optimization gives search engines the context they desperately need. Think of descriptive file names and alt text as little signposts that help Google’s crawlers understand exactly what your page is about.
This simple step strengthens your content’s relevance for your target keywords and dramatically improves your chances of ranking - not just in regular search, but in Google Images, which is a massive source of traffic all on its own.
This isn’t an advanced tactic; it’s a fundamental piece of a healthy SEO strategy. If you’re new to this world, getting these core principles right is non-negotiable. You can get a wider view of how all the pieces fit together in our beginner’s guide to search engine optimization. Mastering your images is one of the most practical steps you can take toward building a high-performing website that lasts.
#Selecting the Right Format and Dimensions
Believe it or not, your image SEO journey starts way before you even think about hitting that “upload” button. The first, and arguably most critical, decisions you’ll make are about the file format and its dimensions. This isn’t just a technical detail; it’s a strategic move that has a massive impact on your site’s speed and how good your images look.
Think of image formats like tools in a toolbox. Each one has a specific job. You wouldn’t try to turn a screw with a hammer, so you shouldn’t use a gigantic, uncompressed PNG for a simple photo in a blog post. It’s all about striking that perfect balance between crystal-clear visuals and the smallest possible file size.
#Choosing the Best Image Format
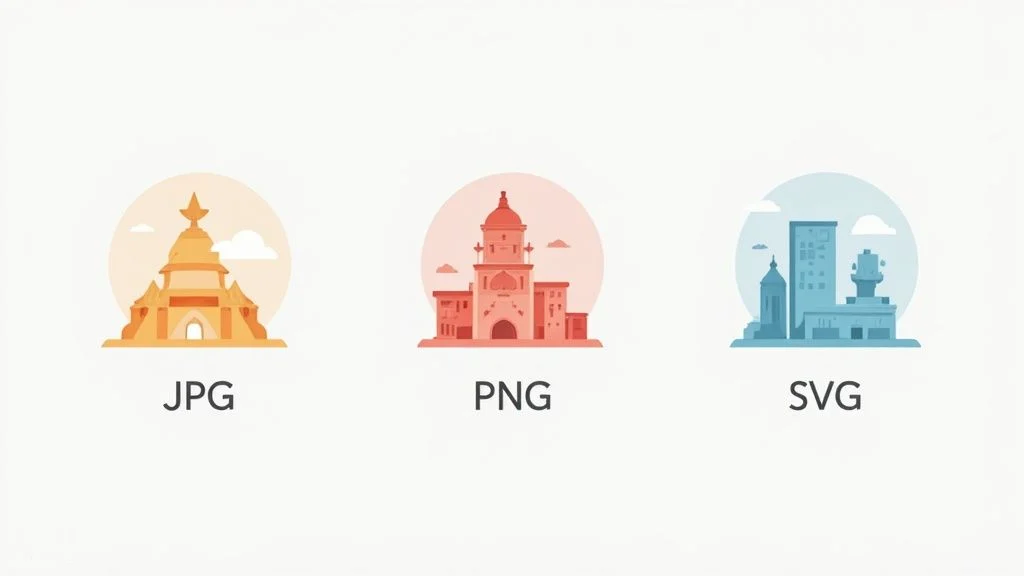
So, which format should you use? The answer always comes down to what the image is for.
For most standard photos, like a detailed product shot on an e-commerce page, JPEG is your workhorse. It’s fantastic at handling complex colors and gradients, and it offers great compression, which is a huge win for keeping your page load times down.
But what if that same product needs a transparent background to sit nicely on a colored part of your website? That’s when PNG becomes the only real option. While PNG files are generally larger than JPEGs, their ability to handle transparency is non-negotiable for clean, modern web design.
For simpler graphics like logos, icons, or illustrations with sharp lines, SVG (Scalable Vector Graphics) is king. Because they are vector-based, you can scale them to any size - from a tiny favicon to a giant banner - and they will never lose quality. This makes them perfect for responsive design.
The real game-changer in recent years, though, is WebP. This modern format, developed by Google, consistently delivers file sizes that are 25-34% smaller than JPEGs and PNGs, often with no noticeable drop in quality. It even supports transparency, making it a powerful, do-it-all option for almost any situation.
You can see the difference for yourself with a tool like Squoosh, which lets you compare formats and compression levels side-by-side.
Look at that. We just took a 1.35MB image and shrunk it down to just 75KB. That’s a massive saving, and you can preview the quality before you even download the file.
#Why Image Dimensions Matter So Much
Once you’ve picked your format, you need to get the dimensions right. It’s a classic mistake: someone uploads a massive, high-resolution photo straight from a camera (say, 4000 pixels wide) and just lets the website’s CSS shrink it down to fit a 600-pixel space.
This is a terrible practice for performance. The user’s browser has to download the entire oversized image file first, then waste processing power to scale it down. This adds precious seconds to your load time, creating a bad user experience and damaging your Core Web Vitals score.
To get this right, here’s what you do:
-
Find the container size: Use your browser’s “Inspect” tool (usually a right-click is all it takes) to figure out the maximum width the image will ever be displayed at on your site.
-
Resize before you upload: Open the image in any editing tool and resize it to those exact dimensions. If its space on the page is 800 pixels wide, make the image 800 pixels wide. No more.
-
Check the resolution: For web use, 72 PPI (Pixels Per Inch) is the gold standard. Anything higher is just dead weight, adding to the file size with zero visual benefit on a screen.
#Writing File Names and Alt Text That Work
Search engines are incredibly smart, but let’s be clear: they can’t see your images the way a person does. They’re blind. Instead, they rely on text clues to figure out what a visual is about and why it’s relevant to someone’s search.
This is where your file names and alternative text (alt text) come in. They are two of the most powerful, and often overlooked, tools in your image SEO toolkit.
Think of it like this: uploading a photo named IMG_4501.jpg is like handing a librarian a book with a blank cover. You’re wasting a golden opportunity to give search engines - and users - critical context. A well-crafted file name and descriptive alt text tell Google exactly what it’s looking at, which directly helps your content get found.
#Crafting SEO-Friendly File Names
Before you even think about uploading an image, pause and rename the file. Seriously. This is your first shot at telling Google what the image is about and slipping in a relevant keyword. Your goal is simple: be descriptive, concise, and clear.
Always use hyphens to separate words. It’s the standard practice search engines understand without any trouble. A generic name like DCIM_0234.jpg does absolutely nothing for your SEO. A simple tweak changes everything.
-
Weak:
image.jpg -
Better:
blue-running-shoes.jpg -
Best:
nike-air-zoom-pegasus-blue-running-shoes.jpg
See the difference? The best example is super specific. It includes the brand and product details, which is exactly what a potential buyer might be searching for. Turning this into a habit transforms your images from anonymous files into hard-working SEO assets.
#Mastering Alt Text for Accessibility and Rankings
Alt text is the unsung hero of image optimization. Its primary job is accessibility - it’s the text read aloud by screen readers to help visually impaired users understand an image’s content. But it also pulls double duty for SEO by giving search engines a rich, detailed caption.
Your alt text should paint a picture with words. The best way to approach it is to describe the image as if you were explaining it to someone over the phone. Be specific, but don’t just stuff it with keywords.
Great alt text finds that sweet spot between being helpful for users and informative for search crawlers. Let’s break it down with an example. Imagine you have a photo of a cat on a couch.
-
Weak Alt Text:
alt="cat"- Way too generic. This is unhelpful for both people and search engines.
-
Average Alt Text:
alt="siamese cat"- Getting warmer, but it still lacks crucial context.
-
Powerful Alt Text:
alt="siamese cat with blue eyes sleeping on a blue velvet couch"- Perfect. It’s descriptive, naturally includes useful terms, and gives a crystal-clear picture of what the image shows.
Optimizing these small text elements isn’t just about technical SEO; it directly impacts your brand awareness and traffic. When you consider that a massive 94% of all clicks come from organic search, making sure your images are properly described and indexed is a no-brainer. To see just how much these small changes can move the needle, check out these latest SEO statistics. Taking a few extra seconds to write thoughtful, descriptive text is a simple change that delivers huge returns.
#Mastering Compression Without Sacrificing Quality
This is where you’ll see some of the biggest, most immediate performance boosts. Image compression is all about algorithmically shrinking an image’s file size. A smaller file means a faster page load. The real magic is shrinking that file as much as humanly possible without anyone noticing a drop in visual quality.
The trick is knowing when to use the two main types of compression: lossy and lossless. They work in completely different ways, and picking the right one for the job is a game-changer for your image SEO.
#Lossy vs. Lossless: The SEO Choice
Lossy compression works by permanently throwing away some of the image data. Don’t let that scare you. It’s smart about it, discarding pixels that are redundant or that the human eye is unlikely to miss. This approach can slash file sizes by over 70%, making it the perfect choice for most web images - especially detailed photographs like product shots or big hero banners. JPEG and WebP are your go-to formats for lossy compression.
On the other hand, lossless compression shrinks the file size without discarding a single pixel of data. It just reorganizes the data more efficiently and puts it all back together perfectly when someone views the image. This method is crucial for graphics where every detail counts, like logos, icons, or technical diagrams full of sharp lines and solid colors. PNG files use lossless compression, which is why they’re often larger but keep that perfect clarity.
For most images on your site, a moderate dose of lossy compression is your best friend. The file size savings are massive, and the quality difference is usually invisible to the average visitor. It’s a huge win for your page speed and user experience.
#Top Tools for Effective Compression
You don’t need fancy, expensive software to compress your images. In fact, some of the best tools are free and can get the job done in seconds. Here are a few I rely on:
-
TinyPNG** / TinyJPG:** A true classic for a reason. This tool uses smart lossy compression to dramatically shrink PNG, JPEG, and WebP files. Just drag and drop up to 20 images at a time. Simple and effective.
-
Squoosh: This is a more advanced, in-browser tool from Google. It gives you a live, side-by-side preview so you can play with the compression settings and see exactly how the quality changes in real-time before you download. It’s fantastic for finding that perfect balance.
-
ImageOptim: A brilliant free app for Mac users. It runs multiple compression algorithms to squeeze every last kilobyte out of your images, often without any noticeable impact on quality.
Once your newly compressed images are live on your site, the job isn’t quite done. The next step is to monitor their impact and see the results of your hard work. For a deeper look into tracking performance, you might find it helpful to learn how to use Google Search Console to see how your site’s speed and visibility improve over time.
Got the basics of image optimization down? Great. Once you’ve handled the essentials - like picking the right formats, writing solid alt text, and compressing your files - it’s time to dig into some more advanced tactics.
These are the strategies that can really push your site’s performance over the top, giving you a serious leg up on the competition and making a real difference to your Core Web Vitals.
Let’s talk about two powerful techniques: lazy loading and image sitemaps. They might sound a bit technical, but they’re surprisingly easy to get going and deliver some major, measurable wins for both your users and your search rankings.
#Squeeze Out More Speed with Lazy Loading
Lazy loading is a clever little trick that makes a huge difference to your page’s initial load time. Instead of trying to load every single image on a page the moment a user lands on it, the browser waits. It only loads images as the user scrolls down and they’re about to enter the screen.
Think about it. This simple shift means the browser only has to download and render the content that’s immediately visible. The result? A much, much faster initial page load. This is a massive win for Google’s Core Web Vitals and for keeping impatient visitors from hitting the back button.
You’ve got two main ways to get this done:
-
Native Browser Lazy Loading: This is the easiest route by far. Just add a simple attribute,
loading="lazy", to your image tags. Modern browsers know exactly what to do with it. It’s clean, simple, and doesn’t add any extra weight from scripts. -
JavaScript-Based Lazy Loading: If you need more fine-tuned control or want to make sure it works on older browsers, a JavaScript solution is your best bet. If you’re on a platform like WordPress, there are fantastic plugins that handle this for you. These libraries often give you more granular control over things like loading thresholds and can even add cool placeholder effects.
No matter which path you take, the goal is the same: load what the user sees first, and load the rest later. It’s a proven strategy. One study found that pushing load time from one to three seconds increases the bounce rate by a staggering 32%. Lazy loading is one of your best weapons against that.
#Help Google Find Every Image with a Sitemap
You already know a standard XML sitemap is a roadmap for Google to find all your pages. An image sitemap does the exact same thing, but specifically for your visual content. This is an absolute must-have for any site where images are a core part of the experience - think e-commerce stores, photography portfolios, or recipe blogs.
An image sitemap ensures Google discovers and indexes images that its crawlers might otherwise miss, especially visuals that are loaded in with JavaScript. By giving Google a clear, explicit list of all your image URLs and their metadata, you’re not leaving anything up to chance.
You can either add this image information into your existing XML sitemap or, if you have a ton of images, create a separate file just for them. For every image you list, you can include key details:
-
The image URL (this one’s required)
-
A descriptive caption
-
The image’s title
-
The geographic location where the photo was taken
Once your sitemap is ready, you just submit it through Google Search Console. This sends a direct signal to Google that your visual content is valuable and should be indexed for relevant searches in Google Images. It’s a proactive step that makes sure all your hard work on image optimization actually pays off with better visibility and more traffic.
#Frequently Asked Questions About Image SEO
Even after you’ve got the basics down, a few specific questions about image SEO always seem to crop up. I’ve heard them all over the years. This section is here to give you quick, no-fluff answers to the most common ones.
Think of it as a cheat sheet to make sure every single image on your site is pulling its weight.
#Does Image SEO Really Affect My Rankings?
Yes, absolutely. This isn’t just a “nice-to-have” anymore - it’s a core part of any solid SEO strategy. For starters, properly optimized images directly improve your page speed, which is a confirmed Google ranking factor.
But it goes deeper than that. Well-optimized images give search engines vital context about what your page is about. This helps solidify your page’s authority on its topic and can open up a surprisingly significant stream of traffic directly from Google Images.
#What Is the Ideal File Size for a Web Image?
There’s no single magic number, but a fantastic target to shoot for is keeping your images under 150 KB. You might have to push it to 300 KB for a big, full-width hero image, but that should be the exception, not the rule.
The real goal is to strike that perfect balance: the crispest visual quality at the smallest possible file size. This almost always means using modern formats like WebP and being diligent about compression for every single image you upload.
#Should I Use AI to Write My Alt Text?
AI tools can be a great starting point, especially if you’re tackling a huge backlog of images. They’re fantastic for churning out a decent first draft and saving you a ton of time.
However, you should always review and refine what the AI spits out. An AI doesn’t understand your page’s specific keyword strategy or the nuances of your content. That final human touch is what turns a generic description into alt text that’s truly optimized for both accessibility and SEO.
#Is an Image Sitemap Necessary for Every Website?
While it’s not a strict requirement for every site out there, I strongly recommend an image sitemap for certain types. It’s especially crucial for:
-
E-commerce stores with hundreds or thousands of product photos.
-
Photography portfolios where the images are the main content.
-
Any site that relies heavily on JavaScript to load its visuals.
An image sitemap is your way of explicitly telling Google, “Hey, here are all my important images, please don’t miss them.” It ensures they get crawled and indexed properly. Since great visuals boost engagement, learning how to improve click-through rates often involves optimizing every element on your page - images included. Honestly, it’s a best practice with no real downside.
Ready to take control of your SEO performance? The Rankdigger all-in-one SEO platform provides the tools and insights you need to turn optimization into results. From identifying high-potential keywords to tracking your progress, we make data-driven growth accessible to everyone. Get started today at https://rankdigger.com/en.